INTRO
I still remember the moment I fell in love with coq au vin. It wasn’t in a Michelin-starred Parisian bistro or a cookbook-filled kitchen—it was standing in a sun-drenched farmhouse in the French countryside, watching a grandmother cook with the kind of effortless confidence that only decades of practice can bring.
She didn’t consult a recipe. She didn’t measure. She just knew—when the chicken was brown enough, when the wine had reduced enough, when the sauce had reached that perfect glossy consistency that would make anyone weak in the knees. And when I finally sat down to eat, surrounded by her family in a garden heavy with summer fragrance, I understood something profound: this wasn’t just dinner. This was love, transformed into food.
This coq au vin recipe is my homage to that afternoon. It breaks down the professional French technique into simple, foolproof steps that anyone can follow. We marinate the chicken overnight so the wine flavor penetrates deep into the meat—not just coats the surface. We build the sauce layer by layer, searing each component separately to develop maximum complexity. We use the marinade vegetables as our flavor base, creating a dish of such depth and richness that you’ll swear it simmered for two days.
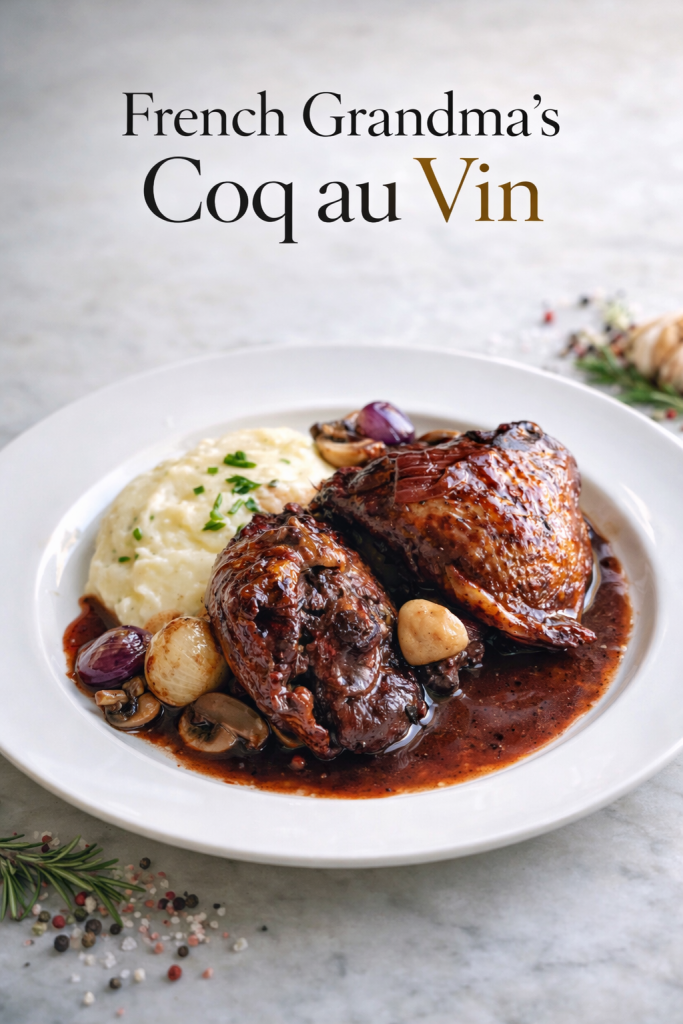
The result is fall-off-the-bone chicken in a glossy, velvety sauce that tastes like it came straight from a Parisian bistro. And the best part? It’s actually achievable on a Tuesday night (okay, a Tuesday night when you planned ahead). This is the coq au vin that will ruin all others for you—in the best possible way.
THE HISTORY
Coq au vin—literally “rooster in wine”—is one of France’s most beloved culinary exports, but its origins are surprisingly humble and shrouded in legend .
One persistent myth traces the dish to ancient Gaul and Julius Caesar around 50 BCE. According to this story, a Gallic chieftain sent a rooster to Caesar as a symbol of defiance, and Caesar—ever the showman—invited the chieftain to dinner where the rooster was served braised in wine from the region . It’s a romantic tale, but historians generally dismiss it as folklore.
What we know for certain is that coq au vin existed as a rustic peasant dish long before it appeared in any cookbook. Farmers would use older roosters—birds that had outlived their usefulness in the henhouse—and transform their tough, stringy meat through long, slow braising in local wine. The acid in the wine broke down connective tissue, turning an inedible bird into something tender and delicious. This was cooking born of necessity, not luxury .
The first documented recipe appeared in 1864 in “Cookery for English Households, by a French Lady,” though it was likely poulet au vin blanc (chicken in white wine) rather than the red wine version we know today . The dish gained wider recognition in the early 20th century, appearing in French cookbooks like Edmond Richardin’s 1906 “La cuisine française: l’art du bien manger” .
But coq au vin’s true rise to international fame came thanks to an American: Julia Child. When she included the recipe in her 1961 masterpiece “Mastering the Art of French Cooking” and later prepared it twice on her PBS show “The French Chef,” American home cooks fell in love . The dish became synonymous with French cooking itself—elegant, complex, yet somehow achievable. Child’s coq au vin was seen as one of her signature dishes, and it helped launch a generation of Americans into the joys of French cuisine .
Today, coq au vin has evolved beyond its Burgundian roots. Different regions of France create their own versions using local wines: coq au Riesling in Alsace, coq au vin jaune in the Jura, even coq au Champagne for celebrations . But the soul remains the same: chicken, wine, time, and love.
THE SCIENCE
Understanding what happens chemically in your Dutch oven transforms you from a recipe-follower into a true cook. Coq au vin is a masterclass in culinary science, with multiple processes working in harmony to create something far greater than the sum of its parts.
Acid Denaturation: The wine in your marinade does more than add flavor. Its acidity initiates a process called denaturation, where the long, tightly-wound protein strands in the chicken begin to unwind and break apart . This is why the dish traditionally used tough old roosters—the acid slowly tenderized meat that would otherwise be inedible. Modern chicken is more tender to begin with, but that overnight marinade still works its magic, making every bite supremely succulent. (Though don’t go too long—two days in an acidic marinade will turn your chicken to mush) .
The Maillard Reaction: That gorgeous golden-brown crust you develop when searing the chicken isn’t just for looks. It’s the Maillard reaction in action—a complex series of chemical reactions between amino acids and reducing sugars that creates hundreds of new flavor compounds . This is why we brown the chicken in batches, why we take the time to get it truly golden rather than pale. Those brown bits stuck to the bottom of the pot? They’re pure concentrated flavor, waiting to be deglazed into your sauce. The Maillard reaction also works its magic on the bacon and mushrooms, adding layer upon layer of savory depth .
Caramelization: While the Maillard reaction works on proteins, caramelization transforms sugars. This is why we take time with the pearl onions—as they cook slowly, their natural sugars break down and reform into new compounds with rich, sweet, complex flavors . This isn’t just browning; it’s flavor alchemy.
Collagen Breakdown: Chicken thighs contain significant amounts of collagen, a structural protein that gives meat its toughness. During that long, gentle braise—45 minutes to an hour at a low simmer—collagen slowly hydrolyzes into gelatin . This is why the finished sauce has that luxurious, velvety mouthfeel. The gelatin not only enriches the sauce but also coats your palate, making every flavor linger longer.
Wine Reduction: As the sauce simmers, alcohol evaporates and water content reduces, concentrating the wine’s flavor compounds. The initial astringency of raw wine mellows into something rounder, fuller, and deeply harmonious with the other ingredients . This is why we simmer the wine before adding it—or why we braise long enough for that transformation to occur naturally.
GOOD PAIRING FOOD AND DRINK
One Appetizer: Gougères (French Cheese Puffs)
Start your meal with these elegant, addictive choux pastry puffs studded with Gruyère cheese. Their light, airy texture and savory cheese flavor provide a perfect foil for the rich wine sauce to come. The gougères are also a nod to Burgundy, where both coq au vin and this classic cheese puff originated. Serve them warm from the oven with a glass of the same wine you’ll use for cooking—it creates a beautiful through-line for the meal.
One Main Course: This Coq au Vin
This is the main event. With its rich, complex sauce and fall-apart tender chicken, coq au vin needs no accompaniment beyond the side dishes below. It’s substantial enough to stand alone as the centerpiece of a special dinner.
One Side Dish: Creamy Mashed Potatoes or Buttered Egg Noodles
You need something to soak up every drop of that glorious sauce. Creamy mashed potatoes provide a luxurious bed for the chicken and catch the sauce in every crevice. Alternatively, wide egg noodles tossed with butter and parsley offer a classic French bistro accompaniment. Either way, don’t skimp—the sauce is too good to leave on the plate.
One Side Dish: Haricots Verts with Shallots
For a bright, fresh counterpoint, serve simply prepared haricots verts (thin French green beans). Quickly blanch them, then sauté in butter with minced shallots until tender-crisp. Their bright green color and clean flavor cut through the richness of the stew, and the shallots echo the allium notes in the main dish.
One Dessert: Tarte Tatin
End with another French classic: an upside-down caramelized apple tart with buttery, flaky pastry. The apples’ natural sweetness, intensified by caramelization, provides a perfect contrast to the savory meal. A dollop of crème fraîche or vanilla ice cream melting into the warm apples? Perfection.
One Cocktail: Kir Royale
Start the meal as the French would—with a Kir Royale. Crème de cassis (blackcurrant liqueur) topped with Champagne creates a beautiful, festive apéritif. The berry notes in the cassis echo the fruitiness of the Pinot Noir you’ll serve with dinner, creating a seamless transition from cocktail to meal.
One Non-Alcoholic Drink: Sparkling Elderflower Spritz
For an elegant alcohol-free option, combine sparkling water with a splash of elderflower cordial and a squeeze of fresh lemon. Serve in a Champagne flute with a twist of lemon peel. The floral, lightly sweet notes complement the herbs in the stew without overwhelming them, and the bubbles refresh the palate beautifully.
Dish Origins and Evolution
- Source: TheFreeDictionary / Wikipedia – “Coq au vin”
- Link: https://encyclopedia.thefreedictionary.com/Coq+au+vin
Julia Child’s Role
- Source: TheFreeDictionary / Wikipedia – “Coq au vin”
- Link: https://encyclopedia.thefreedictionary.com/Coq+au+vin
Peasant Origins
- Source: Gourmet Traveller – “Masterclass: Coq au vin”
- Link: https://www.gourmettraveller.com.au/recipe/explainers/masterclass-coq-au-vin-14246/
Description
This coq au vin recipe delivers fall-off-the-bone chicken in a glossy, richly flavored wine sauce—without requiring a whole rooster or two days in the kitchen. An overnight marinade infuses deep flavor, while layered searing builds complexity worthy of a Parisian bistro. Perfect for special dinners that are actually achievable.
Ingredients
For the Marinade:
For Cooking:
For Finishing:
Instructions
PART 1: THE OVERNIGHT MARINADE (THE GAME-CHANGER)
-
Step 1: Combine and Marinate
In a large bowl or resealable plastic bag, combine the chicken thighs, red wine, chopped carrot, chopped onion, thyme sprigs, bay leaves, peppercorns, and 1 teaspoon kosher salt. Seal or cover and refrigerate for a minimum of 4 hours—but ideally overnight (8-12 hours). This long marination allows the wine's acidity to penetrate deep into the meat, tenderizing and flavoring from within .Step 2: Prepare for Cooking
When you're ready to cook, remove the chicken from the marinade. This next step is crucial: pat the chicken thighs completely dry with paper towels. Any moisture on the surface will steam instead of sear, preventing that beautiful golden-brown crust we're after.Place a fine-mesh sieve over a bowl and pour the entire marinade through. Reserve the liquid—that's your wine base. Also reserve the solid vegetables (carrot and onion). Discard the thyme stems and bay leaves.
PART 2: BUILDING LAYERS OF FLAVOR
-
Step 3: Sear the Garnishes
Heat 1 tablespoon of olive oil in a large Dutch oven or heavy-bottomed pot over medium heat. Add the peeled pearl onions and cook, stirring occasionally, until they're golden brown on all sides, about 5-7 minutes. The slow caramelization develops their natural sugars, adding depth to the final dish . Use a slotted spoon to transfer them to a plate; set aside.In the same pot (don't clean it!), add the halved mushrooms. Sauté over medium heat until they release their liquid and begin to brown, about 5-6 minutes. Remove with a slotted spoon and set aside with the onions.
Step 4: Dredge and Sear the Chicken
On a plate or shallow dish, combine the flour, 1 teaspoon salt, and ½ teaspoon pepper. Dredge the dried chicken thighs in the seasoned flour, shaking off any excess. The flour will help thicken the sauce later and contribute to browning.Add the remaining 1 tablespoon of olive oil to the pot. Increase heat to medium-high. Place the chicken thighs in the pot, skin-side down first. Don't crowd them—if your pot is small, work in batches. Let them cook undisturbed for 4-5 minutes until the skin is deep golden brown and crispy. Flip and brown the other side for 2-3 minutes. This browning triggers the Maillard reaction, creating hundreds of new flavor compounds that form the backbone of your sauce .
Remove the chicken to a plate and set aside. Don't worry if it's not cooked through—it will finish in the braise.
Step 5: Build the Flavor Base
Add the diced bacon to the pot. Cook over medium heat until crispy and the fat has rendered, about 5-6 minutes. Using a slotted spoon, remove the bacon and add it to the plate with the mushrooms and onions.Pour off all but about 2 tablespoons of fat from the pot (or leave more if you're feeling indulgent). Add the reserved carrot and onion solids from the marinade. Cook for 6-8 minutes, stirring occasionally, until softened and beginning to brown. These vegetables have already absorbed wine flavor during marination—now they'll release it back into the sauce.
Stir in the tomato paste and cook for 1 minute, until it darkens slightly and becomes fragrant. Tomato paste adds umami depth and helps color the sauce.
PART 3: THE BRAISE & FINISH
-
Step 6: Deglaze and Combine
Pour the reserved marinade liquid into the pot. Increase heat to high and bring to a boil, scraping up all those browned bits from the bottom of the pot with a wooden spoon. Those bits are concentrated flavor—don't leave them behind!Let the wine boil for 3 minutes to cook off the alcohol and concentrate its flavor. Add the chicken broth and bring back to a simmer.
Step 7: Braise
Return the chicken thighs to the pot, along with any accumulated juices from the plate. The liquid should come about halfway up the chicken pieces—not fully submerge them. Cover the pot with a tight-fitting lid, reduce heat to low, and let it simmer gently for 45 minutes to 1 hour.You'll know it's done when the chicken is fork-tender and nearly falling off the bone. The gentle braise allows collagen to break down into gelatin, creating that luxurious, velvety sauce texture .
Step 8: Finish the Sauce
Using tongs, carefully remove the chicken thighs to a serving platter and tent loosely with foil to keep warm.Increase heat to medium-high and bring the sauce to a simmer. Let it reduce for 5-10 minutes, until it thickens slightly and the flavors concentrate. Taste and adjust seasoning with salt and pepper.
Turn off the heat. Add the softened butter and swirl the pot until it melts completely, creating a glossy, silky finish. This monté au beurre technique (finishing with butter) is a classic French touch that adds sheen and richness.
Step 9: Reunite and Serve
Return the reserved pearl onions, mushrooms, and bacon to the pot. Stir gently to coat with sauce and warm through. Add the chicken back to the pot or arrange on a serving platter and spoon sauce and vegetables over the top.Garnish generously with fresh chopped parsley. Serve immediately with mashed potatoes, buttered egg noodles, or crusty bread to soak up every drop of that incredible sauce.
Equipment
-
 Large Dutch Oven
Nutrition Facts
Servings 3
- Amount Per Serving
- Calories 585kcal
- % Daily Value *
- Total Fat 32g50%
- Saturated Fat 12g60%
- Sodium 890mg38%
- Total Carbohydrate 18g6%
- Dietary Fiber 2g8%
- Sugars 6g
- Protein 38g76%
- Vitamin A 2800 IU
- Calcium 60 mg
- Iron 3.5 mg
* Percent Daily Values are based on a 2,000 calorie diet. Your daily value may be higher or lower depending on your calorie needs.
Note
Pro Tips for Success
- Don't skip the marinade: This is the single most important step for developing deep, complex flavor. The wine penetrates the meat rather than just coating it .
- Pat chicken completely dry before dredging: Moisture is the enemy of browning. Take an extra minute with paper towels.
- Brown in batches if needed: Crowding the pan lowers temperature and steams instead of sears. Give each piece room.
- Save those marinade vegetables: They've absorbed wine flavor and become the foundation of your sauce—zero waste, maximum taste.
- Low and slow wins the race: Once you add the liquid and cover, keep the heat low. A gentle simmer, not a boil, ensures tender meat.
- Taste before adding salt: Bacon and broth vary in saltiness. Adjust at the end.
Wine Selection
Choose a wine you'd actually drink—its flavor will concentrate in the sauce. Classic choices include:
- Pinot Noir: Light to medium body, bright acidity, earthy notes that complement the mushrooms
- Burgundy: The traditional choice, offering complexity and depth
- Beaujolais: Fruity and lighter, with bright notes that balance the richness
Avoid "cooking wines" or anything labeled "cooking wine"—they contain added salt and preservatives that will ruin your dish.
Make-Ahead Instructions
Coq au vin actually tastes even better the next day, after the flavors have melded.
- To make ahead: Prepare the full recipe, cool completely, and refrigerate in an airtight container for up to 3 days. The sauce will thicken as it sits; thin with a splash of broth or water when reheating.
- Reheating: Gently reheat on the stovetop over medium-low heat, stirring occasionally, until piping hot throughout.
- Freezer: Coq au vin freezes beautifully for up to 3 months. Thaw overnight in the refrigerator before reheating.
Substitutions
- Chicken: Bone-in, skin-on chicken thighs are ideal—they stay moist during long cooking and add flavor. You can use drumsticks or a combination, but avoid boneless, skinless breasts, which will dry out.
- Bacon: Thick-cut bacon works perfectly. For a more authentic French touch, use lardons or pancetta.
- Pearl onions: Frozen pearl onions are a fantastic time-saver. Thaw and pat dry before searing. If using fresh, blanch them in boiling water for 30 seconds, then shock in ice water—the skins slip right off.
- Mushrooms: Cremini or button mushrooms work well. For more complex flavor, try a mix that includes shiitake or oyster mushrooms.
- Flour: For a gluten-free version, substitute 2 tablespoons cornstarch mixed with 2 tablespoons cold water (slurry) added at the end instead of the initial dredge.
- Wine: Any dry red wine works—see wine notes above.
Troubleshooting
- Sauce too thin? Remove chicken and boil sauce uncovered for 5-10 minutes to reduce and concentrate.
- Sauce too thick? Thin with additional chicken broth or water until desired consistency.
- Chicken tough? It likely needed longer braising time. Return to pot and simmer gently until tender.
- Bitter sauce? Usually from reducing wine too aggressively or using a wine with harsh tannins. A pinch of sugar can help balance.
- Greasy sauce? Too much fat remained. Next time, skim more fat before serving, or use a fat separator.