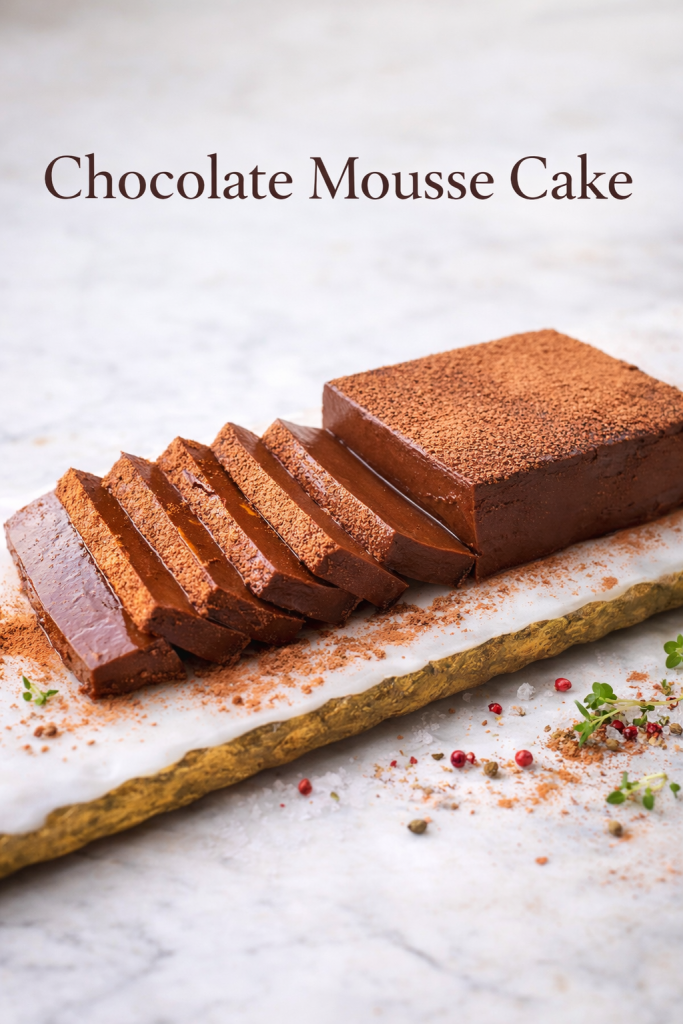
Make this no bake chocolate mousse cake for a silky, eggless dessert. Rich, creamy, and sets beautifully with gelatin—perfect for any occasion.
INTRO
Have you ever wanted a dessert that looks like it came from a fancy French patisserie but requires no oven time and minimal fuss? Meet this no bake chocolate mousse cake.
This no bake chocolate mousse cake delivers pure decadence without eggs or complicated techniques. A rich chocolate base meets a silky, aerated mousse that sets beautifully with gelatin. The result is a dessert that slices cleanly, melts on your tongue, and satisfies the deepest chocolate cravings. Made with sweet chocolate, heavy cream, and a touch of cocoa powder, this cake proves that elegant desserts do not require baking or a culinary degree.

Let me walk you through the history, the science, and every step to achieve mousse cake perfection.
THE HISTORY
Chocolate mousse as we know it today has French origins, though chocolate itself arrived in Europe from Mesoamerica much earlier. The Aztecs and Mayans consumed chocolate as a bitter, frothy beverage long before Europeans added sugar and transformed it into a confection. According to The Oxford Companion to Sugar and Sweets, chocolate reached Spain in the 16th century and gradually spread across Europe, where it remained a luxury for the elite.
The word “mousse” means “foam” in French, and the first chocolate mousse recipes appeared in French cookbooks during the 19th century. These early versions relied on eggs for their airy structure. Chefs separated eggs, whipped the whites to soft peaks, and folded them into melted chocolate. It was a technique that required precision and care.
The evolution toward eggless mousse came later, driven by both necessity and innovation. Home cooks needed reliable methods that worked every time. Gelatin provided that consistency. As Serious Eats explains, gelatin-stabilized mousse offers the same luxurious texture without the risk of curdled eggs or under-whipped whites. No bake versions like this one represent the perfect marriage of French technique and modern convenience.
THE SCIENCE
Understanding what happens in this no bake chocolate mousse cake helps you master it completely.
Gelatin Structure: Gelatin consists of collagen, a protein derived from animal connective tissue. When you bloom gelatin in cold water, the granules absorb liquid and swell. Heating dissolves these swollen granules into individual protein strands. As the mixture cools, these strands re-form into a loose, three-dimensional network that traps water and air. According to Science of Cooking, this network creates the stable, sliceable texture of your mousse cake. The 8 grams of gelatin in this recipe provide just enough structure to hold the cake together without making it rubbery.
Emulsion and Foam: Heavy cream with 42% fat content whips beautifully because fat droplets stabilize air bubbles. When you whip cream, you incorporate air and the fat globules partially coalesce, forming a network around those air bubbles. Folding this whipped cream into the chocolate mixture creates a foam—a continuous liquid phase (chocolate, milk, gelatin) with dispersed air bubbles. The gelatin then sets this foam into a permanent structure.
Cocoa Powder Function: The 15 grams of unsweetened cocoa powder serve multiple roles. First, they intensify chocolate flavor without adding extra sugar. Second, cocoa particles absorb some moisture and add subtle texture. Third, cocoa contains natural antioxidants that help preserve the dessert. The 2 tablespoons of hot water hydrate the cocoa, releasing its full flavor potential.
GOOD PAIRING FOOD AND DRINK
One Appetizer: Fresh Berry Salad with Mint
Bright, tart berries provide the perfect contrast to rich chocolate. Toss fresh raspberries, strawberries, and blueberries with a touch of sugar and fresh mint. The acidity cuts through the creamy mousse beautifully.
One Main Course: This dessert stands alone after a lighter main course. Consider serving it after a simple roasted chicken or seared fish to let the chocolate shine.
One Side Dish: Salted Caramel Sauce
A drizzle of warm salted caramel adds depth and complexity. The salt enhances chocolate flavor while the caramel brings buttery sweetness. Make it ahead and warm gently before serving.
One Dessert: This is your dessert! Pair it with a small espresso or a glass of dessert wine for an elegant finish.
One Cocktail: White Russian
The combination of vodka, coffee liqueur, and cream echoes the richness of the chocolate mousse. Serve it on ice in a lowball glass. The coffee notes complement the cocoa beautifully.
One Non-Alcoholic Drink: Spiced Hot Chocolate
Warm milk infused with cinnamon, star anise, and a touch of chili powder makes a cozy companion. The spices highlight the complexity of the chocolate without overwhelming it.

Description
This no bake chocolate mousse cake delivers pure decadence with a silky, gelatin-set texture. No eggs, no oven—just rich chocolate and creamy layers that slice beautifully every time.
Ingredients
Instructions
-
Bloom the gelatin. Sprinkle the 8g of powdered gelatin evenly over 40ml of cold water in a small bowl. Do not dump it all in one clump. Let it sit for 5-10 minutes until the granules absorb the water and form a firm, jiggly mass. This step is essential—gelatin will not dissolve properly without blooming.
-
Prepare the cocoa paste. In a small cup, mix the 15g unsweetened cocoa powder with 2 tablespoons of hot water. Stir until smooth with no lumps. Set aside.
-
Combine all ingredients in a saucepan. In a medium saucepan, combine the chopped sweet chocolate, cocoa paste, whole milk, heavy cream, granulated sugar, and condensed milk.
-
Heat and melt gently. Place the saucepan over medium-low heat. Stir continuously with a whisk as the mixture warms. The chocolate will melt, and the ingredients will combine into a smooth, homogeneous liquid. Do not let it boil—you want it hot enough to melt everything but not simmering. This takes about 4-5 minutes.
-
Add the bloomed gelatin. Remove the saucepan from heat. Add the bloomed gelatin and whisk until completely dissolved. The mixture should feel smooth, with no gelatin granules remaining.
-
Strain for perfection. Pour the mixture through a fine-mesh sieve into a large measuring cup or bowl. This catches any undissolved gelatin bits or chocolate lumps and ensures a silky final texture.
-
Pour into the pan. Pour the mixture directly into a 6-inch springform pan or an 8x4 inch loaf pan lined with plastic wrap for easy removal.
-
Chill until firm. Refrigerate for at least 4 hours, preferably overnight. The cake should feel firm to the touch and hold its shape when you press gently.
-
Unmold and dust. Run a thin knife around the edge of the pan to release the cake. Remove the springform ring or lift from the loaf pan using the plastic wrap. Place on a serving plate. Just before serving, dust the top generously with unsweetened cocoa powder through a fine-mesh sieve.
-
Slice and serve. Slice with a warm, dry knife for clean edges. Serve cold.
Nutrition Facts
Servings 8
- Amount Per Serving
- Calories 385kcal
- % Daily Value *
- Total Fat 26g40%
- Saturated Fat 16g80%
- Sodium 120mg5%
- Total Carbohydrate 33g11%
- Dietary Fiber 2g8%
- Sugars 28g
- Protein 6g12%
- Vitamin A 450 IU
- Iron 2 mg
* Percent Daily Values are based on a 2,000 calorie diet. Your daily value may be higher or lower depending on your calorie needs.
Note
Chocolate quality matters. Use good-quality sweet chocolate, not chocolate chips. Chips often contain stabilizers that affect melting. A bar of Lindt, Ghirardelli, or Valrhona works beautifully. The 100g should be about one standard chocolate bar.
Gelatin type. This recipe uses powdered gelatin. Sheet gelatin works too—use 4-5 sheets (about 8g total). Bloom sheets in cold water until soft, then squeeze out excess water and dissolve in the warm mixture after removing from heat.
Do not boil the mixture. Boiling can affect how gelatin sets and may cause the cream to separate. Heat just until the chocolate melts and the mixture is smooth and hot to the touch.
Pan options. A springform pan makes unmolding easiest. If using a regular cake pan or loaf pan, line it with plastic wrap, leaving overhang on two sides. You can then lift the set cake out easily.
Make-ahead perfection. This cake actually improves after a day in the fridge. The flavors meld and the texture becomes even more luxurious. Make it up to 3 days ahead and keep covered.
Storage. Cover and refrigerate for up to 5 days. The cake will remain perfectly sliceable. Do not freeze—the gelatin structure will break down upon thawing, leaving you with a watery mess.
Serving suggestion. For ultra-clean slices, dip your knife in hot water, wipe it dry, and slice. Repeat between each cut. Dust with fresh cocoa powder just before serving for the prettiest presentation.